


How to Make a Santa Craft for Kids – Fun Indoor Activity in Singapore
Christmas is the perfect time to slow down, get cosy indoors, and create something special together as a family. For parents in Singapore, where rainy afternoons or hot weather often keep kids indoors, simple craft activities can be a wonderful way to turn “I’m bored” moments into joyful bonding time
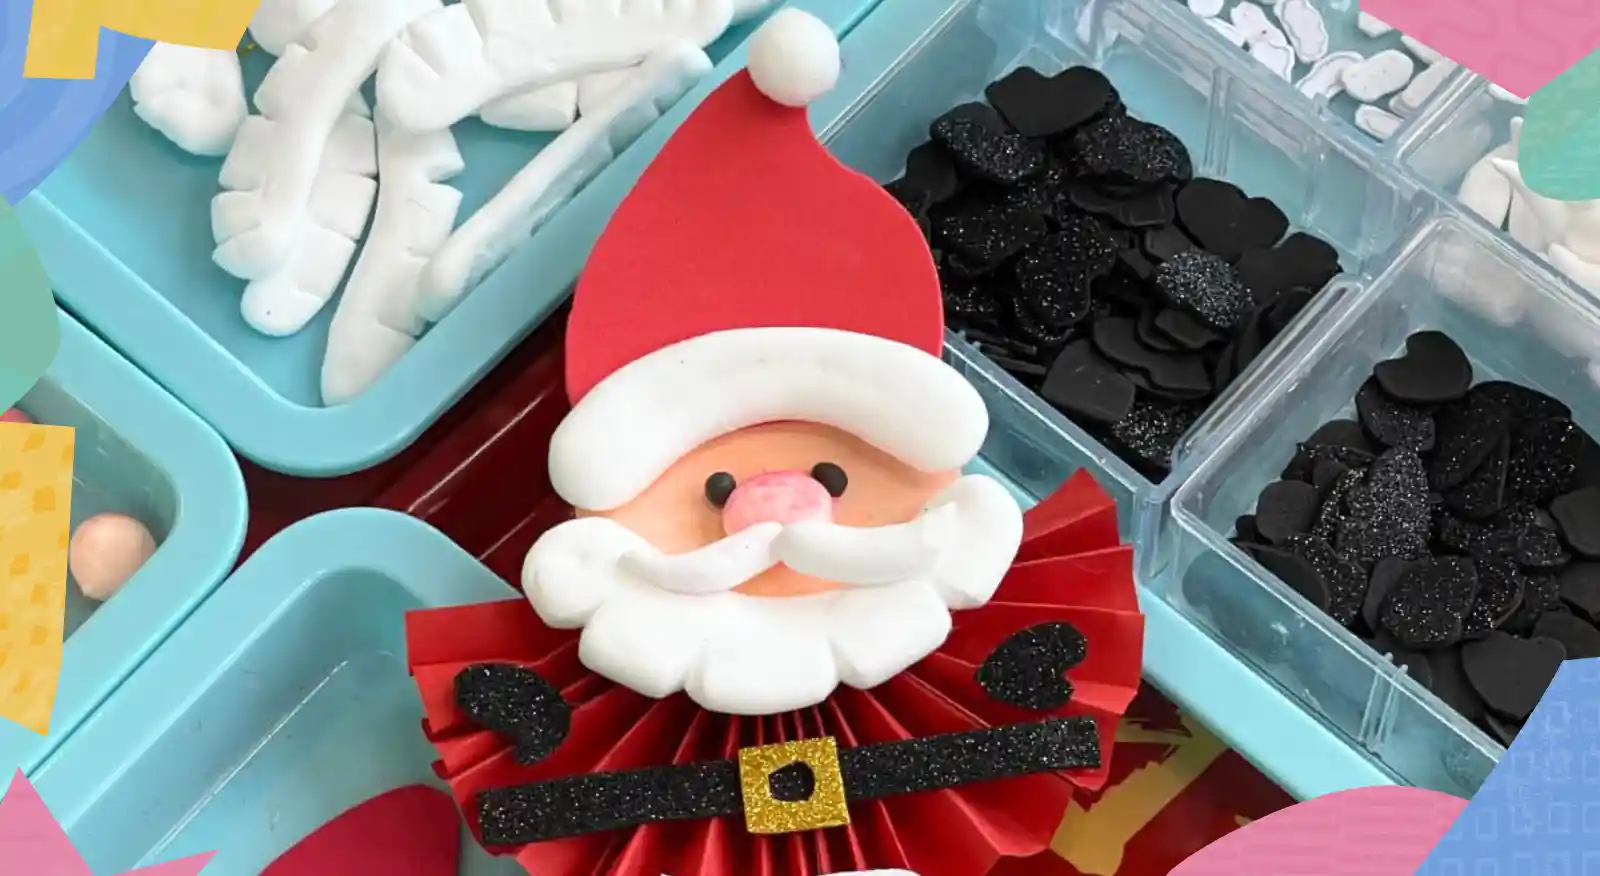
This Santa Accordion Paper Craft is a fun, mess-free activity designed especially for young children aged 3–8. It uses basic materials, encourages creativity, and helps little hands practise important skills—without needing fancy tools or lots of space. Best of all, your child ends up with a cheerful Santa they’ll be proud to display at home!
Why This Santa Craft Is Perfect for Indoor Play in Singapore
Indoor crafts are a lifesaver for families in Singapore. Whether it’s a rainy weekend, a school holiday, or just a quiet afternoon at home, paper crafts offer:
- A calm, screen-free activity
- A chance for parents and children to bond
- Easy setup and quick cleanup
- A creative way to celebrate festive seasons
This Santa accordion craft is especially great because it’s colourful, simple, and flexible. Younger kids can enjoy gluing and decorating, while older kids can take on more cutting and designing.
Materials You’ll Need
Before you start, gather everything on a tray or table. This helps keep the activity organised and stress-free for parents.
- Red paper (for Santa’s body and hat)
- Skin-tone paper (for the face)
- White paper (for beard, hat trim, moustache)
- Black paper (for hands, shoes, belt)
- Gold or yellow paper (for belt buckle)
- Glue stick or child-safe liquid glue
- Safety scissors
- Black marker
- Pink pom-pom or pink paper (for the nose)
Parent tip: For younger children, pre-cut some shapes in advance so they can focus on assembling and decorating.
Step-by-Step: How to Make Your Santa Accordion Craft
Step 1: Make Santa’s Body
This accordion body is what gives Santa his fun, 3D look.
- Take a strip of red paper (about the width of your child’s hand).
- Fold it back and forth in a zig-zag or fan style.
- Press each fold neatly using fingers or the edge of a ruler.
- Pinch the folded strip in the centre.
- Add glue to the centre and press gently to form a half-circle fan.
For kids: This is like making a paper fan!
For parents: Help guide the folds so they stay even.
Step 2: Make Santa’s Face
Santa’s friendly face brings the whole craft to life.
- Cut a circle from skin-tone paper.
- Use a black marker to draw two simple eyes.
- Glue a pink pom-pom or small pink paper circle in the middle for the nose.
You can let kids decide if Santa should have big eyes, tiny eyes, or even a cheeky smile.
Step 3: Make the Beard
Santa’s beard is fluffy and fun to create.
- Cut a cloud-like shape from white paper.
- Glue it just under the face.
- Cut a small curved shape for the moustache and glue it above the beard.
Creative tip: Let kids make the beard long, short, or extra curly!
Step 4: Make Santa’s Hat
No Santa is complete without his iconic hat.
- Cut a triangle from red paper.
- Cut a thin white strip and glue it along the bottom of the triangle.
- Glue a white pom-pom at the tip of the hat.
- Attach the hat to the top of Santa’s head.
This step is a great chance to talk about colours and shapes with younger kids.
Step 5: Make Hands & Shoes
Now let’s give Santa some arms and feet.
- Cut small black shapes for the hands.
- Cut slightly larger shapes for the shoes.
- Glue the hands to the sides of the accordion body.
- Glue the shoes to the bottom.
Parent tip: Simple shapes work best—no need for perfection.
Step 6: Make the Belt
Santa’s belt adds a nice finishing touch.
- Cut a thin black strip and glue it across the middle of the red body.
- Cut a gold square for the buckle.
- Cut a small square out of the centre and glue it onto the belt.
Kids love this step because it makes Santa look “official”!
Step 7: Put It All Together
This is the exciting final step.
- Glue Santa’s face onto the top centre of the accordion body.
- Press gently and hold for a few seconds.
- Allow everything to dry completely.
Once dry, carefully open the accordion body so Santa stands proudly.
Create, Bond, and Celebrate Together
This Santa Accordion Paper Craft is more than just an art project—it’s a moment of connection, laughter, and festive joy. Whether you’re crafting on a rainy afternoon or as part of your Christmas countdown, this activity is a wonderful way to spend time together as a family.
Try it at home, enjoy the process, and don’t forget to display your child’s Santa proudly. If you’d like, take a photo and share the joy with friends or relatives—because handmade Christmas crafts always bring the biggest smiles.
Happy crafting and happy holidays!
Frequently Asked Questions (FAQ)
What age group is this Santa accordion paper craft suitable for?
This Santa accordion paper craft is ideal for children aged 3 to 8 years old. Younger kids can enjoy gluing and decorating with adult help, while older children can practise cutting, folding, and assembling independently.
Is this Santa paper craft safe for young children?
Yes, this is a child-safe and mess-free indoor activity when using safety scissors, non-toxic glue, and adult supervision. Parents are encouraged to pre-cut shapes for toddlers and preschoolers.
How long does it take to complete the Santa accordion craft?
On average, the activity takes 30–45 minutes, making it perfect for short indoor play sessions, rainy afternoons, or weekend family bonding time in Singapore.
What skills does my child learn from this Christmas craft activity?
This craft helps develop fine motor skills, creativity, focus, hand-eye coordination, and early problem-solving. It also encourages imagination and parent-child interaction.
Can this Santa craft be used as a Christmas decoration?
Absolutely! Once completed, the Santa accordion craft can be used as a table display, shelf decoration, or festive classroom art, making it both fun and meaningful.